Tuesday, May 28, 2013

Day 13 - Untried Polish Challenge

Being a true child of the 80's I am absolutely in love with the Neon trend. So for my in season challenge I had to go bright orange as it's my favorite color. 

I used CG's Japanese Koi with a coat of Fairy Dust over for a little sparkle. 
The stamp is BM-221 with Konad Black.

I actually have worn this manicure for 3 days (until it started chipping) because I loved it so much.

Saturday, May 25, 2013

Day 12 - Untried Polish Challenge

Today's challenge is prettiest polish.  It's weird because I thought this would be an easy challenge but I honestly struggled with it.  My most prettiest polishes get used right away so while none of them are ugly (see previous challenge post) the ones I'm less excited about might sit for a little longer.

That being said, I'm very pleased with the polish I used today.  It's much prettier on than it is in the bottle.

Liquid Sky Lacquer - Fuchsia Illusion

This is an awesome thermal holo polish.  Two coats for opacity, but I did a third just because.  It changes from a dark violet when cool to a lighter fuchsia when warm. 

For this picture I ran my middle nails under warm water because my house was cold and not showing the transition well.  This makes for a neat French manicure on longer nails since the tips are normally cooler not touching the skin.

Thursday, May 23, 2013

Vintage "French" Manicure

Yesterday I wrote about a YouTube video I'd found by ProfessionalDQ that showed a neat tutorial for some spooky nails.

I took the basic idea, and made it my own going with vintage French designs for a "French" manicure.  (I'm so punny, aren't I?)


On pinky - vintage roses
Ring - Hot air balloon
Middle - Fluer De Lis & Paris
Index - Vintage Roses
Thumb - (not pictured) Eiffel Tower

I started with a base coat of Sephora's Dance Till Fawn.
Using a make-up sponge I sponged Sephora's Don't Feed the Hand Models three coats in the center of my nail only leaving a "frame" of the darker color.
After a quick dunk in rubbing alcohol I pressed newspaper to my nails when they were approx. 75% dry to transfer the text.

The images were created using rub-on transfer paper.  I like Graphix Rub-Onz which I purchased from Amazon.

MAKE SURE TO FOLLOW THE INSTRUCTIONS ON THE PACKAGE!

(I didn't and had to scrap my first 10 images and that paper isn't exactly cheap)

I Googled for images I liked and pasted them into Microsoft Word.  I sized them down until they were small enough to fit on my nails.  I always test print on regular paper first to make sure they are the right size.

*tip - make sure to squeeze them all in together so you use less paper*


After creating the transfers, I cut them out very closely to the image and applied them to the nail.

I added a single very thin coat of OPI's Glints of Glinda.

Finally, I capped the whole thing off with a matte top coat.


After a few hours I added a coat of Gelous to see them glossy.  I think I like the matte look here much better - it feels more "vintage".


What do you think?  Matte or glossy?


Wednesday, May 22, 2013

A few random things

First off, I need to apologize for the wonky appearance of my nails.  I've been wearing acrylics for months and decided that I wanted to go back to natural nails. I'm slowly soaking and buffing it off a little at a time, but it's making for weird tips right now.  I was hoping that doing it this way would allow my nails time to strengthen since they are normally ravaged after acrylic removal.

I'm also not really happy with my limited options on Blogger.  So, if you see things moving around, disappearing, or appearing on my blog just ignore it and know I'm messing around with it trying to make things better... hopefully.  I'm honestly thinking about moving it entirely, but I'll make sure to let everyone know when and where.

Nail art is sort of new to me.  I've been using glitter in various forms for years.  However, stamping, freehand, dotting, etc., are all recent discoveries.  I didn't even know there was such a huge amount of nail artists on the internet until a few months (okay maybe 9 months...) ago when my husband sent me a link to Lost In Lacquer's Zelda Nails.  I thought that I could absolutely do that and then, immediately, I fell down the rabbit hole.  Hopefully, as I am finding all these new ideas I'm getting better and better at  doing them too.

So, to nails.

I'm kind of ahead on the untried polish challenge and have manicures completed and photographed for the next few so I've had time to play around.  I was watching some Youtube videos yesterday and found a really artistic freehand spooky manicure by ProfessionalDQ.  She's got great tutorials and some pretty wicked nails.  I wanted to try my hand at a replica manicure.

Here are my Something Wicked nails...


You'll notice this is actually my right hand.  I honestly think it came out better than my left oddly enough, but I'll post pics of both.  (Does it look weird to anyone else?)

I used China Glaze Liquid Leather for black base coat
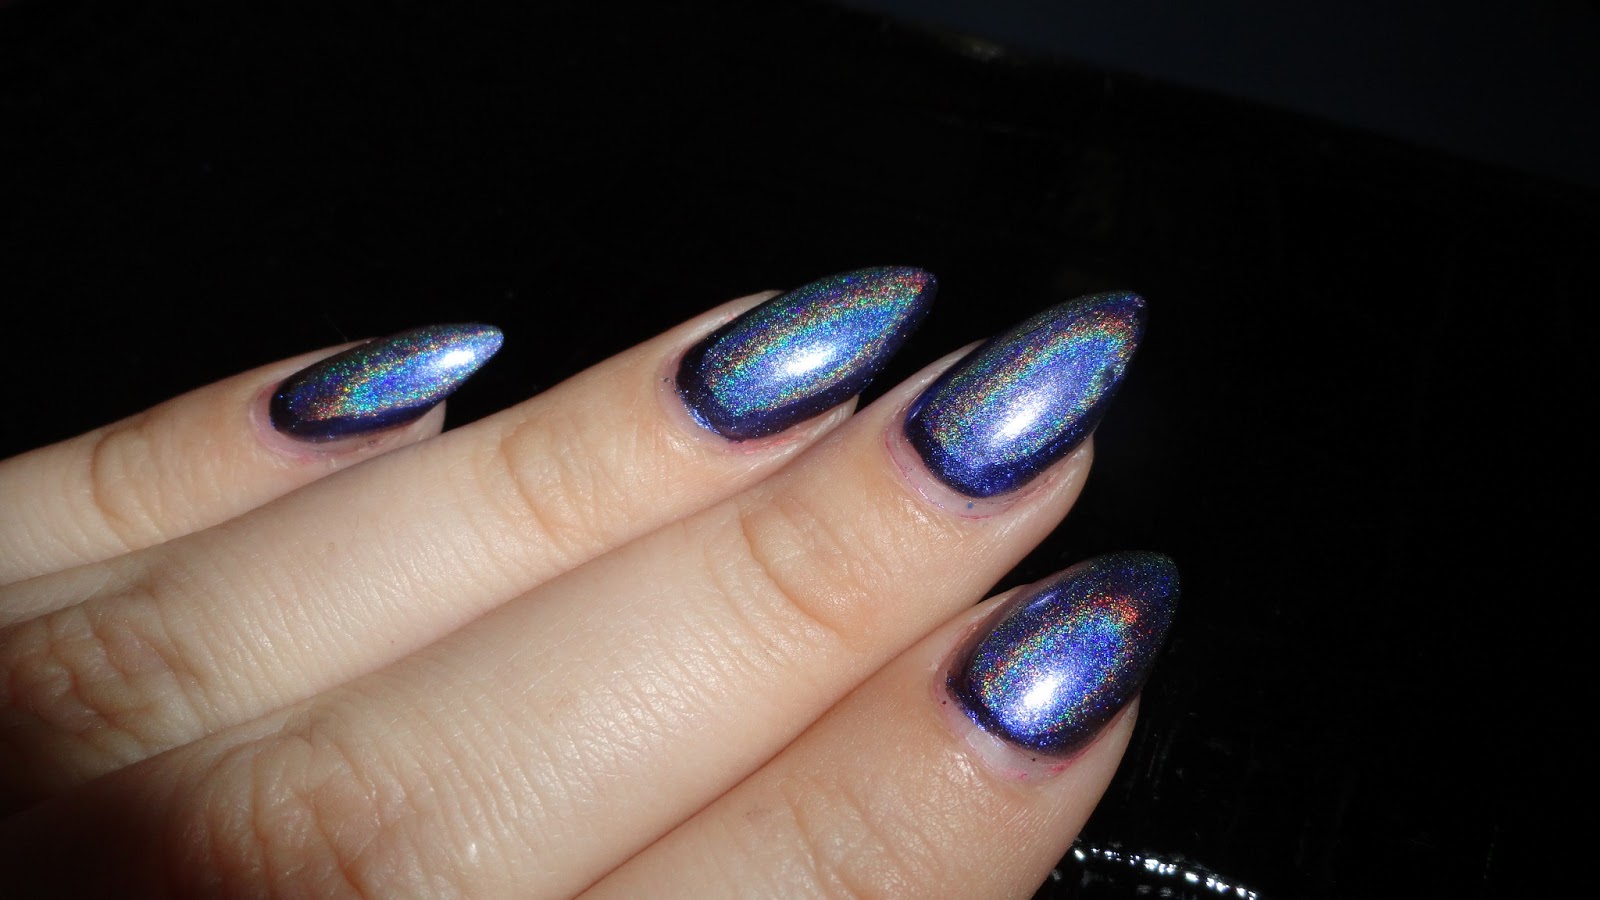
I mixed China Glaze Sea Spray with the holo top coat from Liquid Sky Lacquers.
I sponged it on, then when it was about 80% dry, I used newspaper transfer to add a little interest to the background.
Using Konad Special Polish in black, white, and silver I stamped some bats, ghosts, cats, and even a spooky house (on my thumb though not pictured) from 2013 Bundle Monster Plate pack.  I'm terrible about remembering which plates though...

I topped the whole thing off with a matte top coat.

My preference was for the matte look, but my husband saw my nails after I put some cuticle oil on them and said he preferred the glossy look.

This is after a coat of Seche Vite.


Now my left hand matte, then glossy.


I realized that I need to invest in some real nail art brushes.

So it's not too bad for a first try.  I've actually been inspired to create my own vintage look which I'll be doing later today.


Day 11 - Untried Polish Challenge

Day 11 - Untried Polish Challenge


Almost done!  Wow there are only 5 more manicures to this challenge.  I'm going to have to start looking for a new challenge to join when this one is up.  If anyone knows of a good one, please leave me a comment and let me know.

Today's challenge was ugliest.  Seriously how could anyone own ugly polish?  If it's ugly, I just don't buy it lol.  All my polishes are pretty. ;)

So when I went looking for an ugly polish I hadn't tried yet my pickin's were pretty slim.  I found the one polish I owned that I bought simply because of the name.

My Squishy by Liquid Sky Lacquers.


See I call my 8 year old son, "My Squishy".  I had to buy it...you understand right?

I have to say first of all that this is really not a bad polish at all, I just hate the color blue.  It has to be just the perfect shade for me to even consider wearing it. This however, is not that perfect shade.  That's just my opinion though.

The polish itself is a dark blue jelly with medium blue hex glitter as well as large square white glitter.  As you can see from the pic of the bottle, there is not a massive amount of glitter in this polish, but overall I kind of liked that.  The picture from the website when I purchased it looked like it had more glitter in it.  Only a slight disappointment.  I personally hate removing polish with tons of glitter in it.  I know you can cover your nail in glue (Elmer's) first and it just peels off, but I never think about it in time.  This polish should be really easy to remove, though I am a little worried about staining.  I did have to fish for squares, even after holding the bottle upside down for over an hour before using.

This is four coats plus a thick coat of Seche Vite to dry them quick.  I immediately took these pictures because I knew I would smudge them and sure enough right after taking them I did.

So, this polish, IF you like the color blue, is really great if you like a deep jelly polish.  If you are looking for a true glitter bomb, this isn't it, but is still a very nice polish... even if it is blue.  My nails really do look "squishy".


I added a coat of Spoiled's Shaken Snow Globe to my ring finger for a little extra sparkle.

Take a look at all the other "ugly" manicures from these ladies.


Masha at Lost In Lacquer
Raine at Lacquer Lily
Amy at Fancy Side
Amanda at Designer Nail Accents
Sam at Polished Art
Lizajane at Organic Neglect
Blueberry Pie at Blueberry Nails
Missy at Gnarly Gnails
Uni at Acetone FIles
Isabel at Little Fairy
Raux at Raux Polish
Alison at UKNailRunner

Saturday, May 18, 2013

New Light Box - no more potato pictures!!

I've wanted a light box for a long time, but spending $100 or more on a set always seemed like so much for something so basic.  Today I found a great tutorial on Youtube that showed how to make one out of a cardboard box, some white fabric, and poster board.  I already had the box and the fabric so I ran up to my local office supply store and picked up poster board along with 2 clamping lights.


 So here are a few shots of some of my polishes.  I really just grabbed a few that were handy and started taking pictures.  My goal is going to be to catalog all my polishes, but that might take awhile...  not a bad problem to have though.


Liquid Sky Lacquer - My Squishy
Dark Blue Jelly with small blue hex and medium white square glitter


Deborah Lippmann - Lady Sings the Blues
Untried


Zoya Pixie Dust - (from left) Beatrix, Solange, Destiny
Textured


Illamasqua - Scorch
White Cream
Dry time is FOREVER

All in all I'm pleased with the outcome.  I'll have to work on the placement of the lights and maybe adding a third overhead.  I'm excited about being able to take nice pics of my manicures at midnight if I want to.


Day 10 - Untried Polish Challenge

Day 10 - Untried Polish Challenge

Most expensive

For the most part $8 per full size bottle is my price limit.  I have a few exceptions, but in general, I'm much pickier if I have to pay over that.  This means that my most expensive, that I've paid full price for, is a Deborah Lipmann P.Y.T (Pretty Young Thing).  I picked it up during my Jelly fishing trip to Ulta.

I have to say that when I saw this I ooo'd and awww'd over the pink in the bottle, but on my fingers...not so much.  It's just a little too cool, I look better in warm shades.

I attempted a different kind of jelly sandwhich and used a random white polish to create polka dots in between the layers.  P.Y.T. is a very sheer jelly that layers nicely needing at least three coats to be mostly opaque.  This manicure has about 8 layers total.  That's so crazy to say!  Of course I used SV to help dry it quickly.


Check out the layers!!  I was really excited by this one and can't wait to try it with different shades!

Make sure to head to these other ladies blogs...


Jonochi at Just Add Polish
Masha at Lost In Lacquer
Raine at Lacquer Lily
Amy at Fancy Side
Sam at Polished Art
Lizajane at Organic Neglect
Blueberry Pie at Blueberry Nails
Missy at Gnarly Gnails
Uni at Acetone FIles
Erica at Coat of Mani Colors 

Friday, May 17, 2013

Turquoise

I saw some pretty manicures that attempted to mimic the look of turquoise.   I'm not a big fan of blue, but I like the look.
This was just a quick nail job before I had company over.  It's China Glaze Custom Kicks with CG Liquid Leather and Tarnished Gold applied using plastic wrap.

**Edit - I didn't realize until later how terribly blurry these pictures were - looks like I took them with a potato.**


Day 9 - Untried Polish Challenge

Day 9 - Untried Polish Challenge


Cheapest Polish


Okay, so I'm not sure what the intent was being cheapest, either which is normally priced the lowest or which I paid the least for.  I chose which I paid the least for.  I am also a couponer and with a great Revlon coupon and a gift card I had this one was free.

I was able to get a gorgeous dark blue chrome polish called Cobalt from the Chroma Chameleon collection.  I haven't seen these anywhere else but they are all really nice.  I used two coats but a single thick coat probably would have done just fine.  Coverage was smooth but a little streaky, though not nearly as bad as most other chromes I've tried.

The depth of color on this is amazing.  I'm not really a fan of blue but this was a must have when I saw it.

I put a matte top coat on, then covered the center in a holographic top coat from Liquid Sky Lacquers (one of my fav!)  OMG the holo on this is amazing!  (Photos taken with flash)

I kind of like the outlined look.  I might wear it again and be a little more careful to keep it really nice and even.


Make sure to check out all the amazing ladies doing this Untried polish challenge.


Jonochi at Just Add Polish
Masha at Lost In Lacquer
Raine at Lacquer Lily
Amy at Fancy Side
Sam at Polished Art
Lizajane at Organic Neglect
Blueberry Pie at Blueberry Nails
Missy at Gnarly Gnails
Uni at Acetone FIles
Erica at Coat of Mani Colors 

Thursday, May 16, 2013

Day 8 - Untried Polish Challenge

Day 8 - Untried Polish Challenge

First off, I know this is late but my family and I were on vacation and, well I just was too busy having a great time to think about blogging.  I even wore the same manicure for the last 6 days!

Today's challenge was for my newest polish.  This was from a recent trip to Ulta when I went fishing for Jellies.  I've seen so many jelly sandwich manicures lately and realized I didn't really own any jellies so I had to quickly rectify that.

This was my first attempt at a sandwich manicure.  Its like a million coats (more like 7) of Zoya Katherine layered with OPI Which Witch. I used a few coats of SV in between some of the layers to speed dry time.


I think I got some pretty good depth with this.  It's hard to get a picture that really shows it though.

Make sure to check out the other ladies doing the same challenge.


Jonochi at Just Add Polish
Masha at Lost In Lacquer
Raine at Lacquer Lily
Amy at Fancy Side
Sam at Polished Art
Lizajane at Organic Neglect
Blueberry Pie at Blueberry Nails
Missy at Gnarly Gnails
Uni at Acetone FIles
Erica at Coat of Mani Colors 

Wednesday, May 15, 2013

Day 7 - Untried Polish Challenge

Day 7 - Untried Polish Challenge

Oldest polish

This was tricky for me to figure out my oldest polish.  A few months ago I threw out over half of my polishes because they were old, seperated, bad formulas, or just colors I don't like.  I know I've had this one for a long time and haven't used it but it's just a guess that it's the oldest...

I ended up doing a Southwest manicure using OPI San-Tan-Tonio and My Vampire is Buff for a nice gradient.


I used OPI Matte top coat but thought that it looked a little plain.  I also thought it had a little southwest coloration so I found a stamp and added a decoration to dress it up using Konad special polish in white.


I'm having issues with stamping.  I just started doing stamping a couple months ago and I can't seem to get consistant quality.  You can see the broken up pieces of the stamp, though I don't think it takes anything away from the overall look. Anyone have any suggestions?  What am I doing wrong?

Monday, May 6, 2013

Day 6 - Untried Polish Challenge

Cool Colors - much easier time with this as I have a ton of untried cool colors.


First off, I did this manicure a few days early.  My family is taking a well deserved vacation in early May and I needed to get some of them done early since I won't be changing them while we're gone.  These got done kind of quickly so I have fuzz on my nails from removing the previous manicure and not taking the time to really fix them up again before painting again.  I was being lazy.

So what's cooler than a pale blue?


Pale blue with stamping and glitter!

Base is Sea Spray by China Glaze - another clearance score a couple months ago.
I used Konad's special stamping polish in White and BM-212 for the design.  Not my neatest stamp job, but it was okay.

Sea Spray
Application: Smooth, evened out with 2 coats
Coverage: 2 Coats for full opacity
Description: Pale blue creme with pearly shimmer
Drying time: Slower than average.  It's an older polish though so that may have a lot to do with it.

I applied a coat of Snow Caps by China Glaze to give it an icy feel.  Snow Caps is a thin glitter polish with a very thin white base.  The glitter is an iridescent yellowish gold.

Application: Smooth even on first coat
Coverage: thin - great for a top coat
Drying time - average for a glitter

I finished the manicure off with a coat of SV for glossy finish and speed drying time.


Remember to visit the other doing this challenge with me

Jonochi at Just Add Polish
Masha at Lost In Lacquer
Raine at Lacquer Lily
Amy at Fancy Side
Sam at Polished Art
Lizajane at Organic Neglect
Blueberry Pie at Blueberry Nails
Missy at Gnarly Gnails
Uni at Acetone FIles
Erica at Coat of Mani Colors 


Friday, May 3, 2013

Day 5- Untried Polish Challenge

Warm Colors

This is tricky sometimes because even a gold can be warm or cool.  It's not as cut and dry as Reds = warms and blues = cools as my husband thought.


I had a tough time picking colors on this one because I have used almost all of my warm colors as they tend to be my favorites, though I have many many more cool colors.

While my indecision lingered I tried another brand of nail wrap.  I know, I am sure other polish lovers would probably throw me the stink eye for using them, but I honestly like them.  I also scored about 10 different ones from Sephora for $3 each.  Not a bad deal as most retail for around $10.

I tried the Trend Tips by OPI - Snake Sparkle


I've tried a number of different wrap brands and this one has the absolute best application.  I had ZERO folds!  (that's exciting) and the excess peeled off easily with a little filing.  They are more like nail polish than a sticker.  I prefer that.


The sun didn't quite catch the shimmer of these.  The glitter reflected in every angle.  I got no less than 12 compliments on my nails with these which is pretty awesome since I only wore it for 2 days. 

Now let's talk about the downside to these - removal.

It took forever to get them off with acetone.  I still have micro glitter all over my fingers. (as seen in later picture)

So as much as I love the look, I don't know that I will wear any of the other glittery ones anytime soon.  

I decided that I would just try and replicate the pattern instead, so for today's Untried Polish Challenge I did a warm version of these wraps.


 Base is China Glaze Magnetix in Gold Fusion - I recently got this on clearance from Sally's.
Its a nice flat gold creme polish.  Two coats was plenty for a nice even polish.  I didn't use the magnet.  I'll admit, I tried using the China Glaze magnet and it barely changed the polish.  Not sure if that's the polish's fault, or the magnet.  I'll have to try one of my other magnet polishes to see.

This picture is without a top coat


You can see some shimmer, but it looked kind of matte to me so I used my matte top coat and really flattened them.


Then I used BM-215 to stamp on a snake skin pattern.  I used another untried polish, OPI's DS Mystery.  It's an odd polish to me.  It's deceptive in the bottle.  Very dark purple jelly with gold glitter.  I've had it a really long time and have never used it. Worked well as a stamp polish though, so maybe I'll keep it after all.

Remember to check out the other lacquerista's doing the challenge with me.


Jonochi at Just Add Polish
Masha at Lost In Lacquer
Raine at Lacquer Lily
Amy at Fancy Side
Sam at Polished Art
Lizajane at Organic Neglect
Blueberry Pie at Blueberry Nails
Missy at Gnarly Gnails
Uni at Acetone FIles
Erica at Coat of Mani Colors